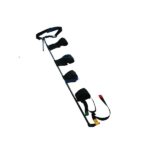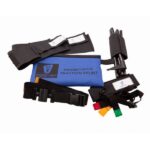

Carbon Traction splint
€95.00 (inc. VAT €95.00)
18 in stock
The Traction Splint is designed to be used on those patients with a suspected limb fracture. Proper use can decrease the pain and damage caused by the fracture. Traction splints are most typically used to treat severe mid-shaft fractures of the femur but also fractures of other limbs. The femur is the longest and strongest bone in the human body; the surrounding muscles (quadriceps) are also incredibly strong.
When the femur breaks, the surrounding muscles can spasm and may result in pulling the bone ends past each other, which results in immense pain, bleeding (internal or external), and muscle and nerve damage. The Traction Splint comes complete with a pole, ankle hitch, lower leg strap, lower thigh strap (fitted to pole) and an upper thigh strap. The pole can be adjusted for length and is robust and durable and the straps are extendable.
- Dimensions: 29.00cm x 15.00cm
- Weight: 450g
- Product shelf life: 5 years
Description
The Traction Splint designed for Pre Hospital Care and Patient transport, specifically in combat scenarios.
It is primarily used on patients with mid-line femur fractures.
The Traction Splint helps relieve patient pain and prevents further damage to
surrounding muscle and tissue while reducing the risk of death caused from severed arteries.
The Traction Splint is made of carbon tubing which snaps together via an internal bungee.
A Cobra buckle secures the Ischial strap to the upper leg and groin. The Traction Splint is extremely compact, light and strong.
SPECIFICATIONS
Light: Unit weighs (535 grams)
Compact: Unit fits in small bag.
Includes carry Bag
Strong: Carbon Fiber poles and injection molded plastics.
Effective: easily adjustable traction.
One unit fits both Adult and Pediatric patients.
Applying a traction splint requires at least two people (the two people will be known as Rescuer 1 and Rescuer 2). To apply a traction splint, you should follow the steps listed below:
1. Rescuer 1 stabilizes the injury with their hands, with one hand below the injury and one hand above the injury.
2. While Rescuer 1 is manually stabilizing the leg, Rescuer 2 should remove any clothing from the leg (pants, socks, shoes, etc).
3. Rescuer 2 assesses the circulation, nerves, and motor function of the injured leg. Circulation can be assessed by feeling for a pulse in the inner ankle, right behind the round bone of the ankle. Nerves can be assessed by simply touching the foot and asking the injured person if they can feel it. Motor function of the leg can be assessed by having the person move their foot or ankle.
4. Rescuer 2 should then apply the ankle hitch, which is a strap that goes around the ankle and under the foot. Once the ankle hitch is applied, Rescuer 2 takes over as the stabilizer of the leg.
5. While stabilizing the leg, Rescuer 2 raises the leg, making sure to continue stabilizing the injury.
6. Rescuer 1 adjusts the traction splint to its correct length, which is 12 inches longer than the leg.
7. Rescuer 1 then slides the traction splint under the injured leg. Then the top strap of the splint should be secured around the upper thigh. To prevent the strap from being too tight, a person should be able to slide two fingers between the strap and the leg.
8. Rescuer 1 then attaches the ankle hitch to the mechanical traction device of the splint. The mechanical traction device helps to apply traction to the injured leg.
9. Rescuer 2 can let go of the leg once they feel the mechanical traction take over.
10. Both Rescuer 1 and 2 can then fasten the rest of the straps of the splint around the injured leg.
11. Either Rescuer 1 or 2 should reassess the circulation, nerves, and motor function of the leg.
12. The injured person should then be placed on a long backboard for extra stabilization.
| Weight | 0.5 kg |
|---|
Related products
© 2025. All Rights Reserved | Flashpoint Systems
Site design & maintained by: PTA IT Solutions


